Removing Fuel Tank Bracket

Repair or modification of Boston Whaler boats, their engines, trailers, and gear
User avatar
picflight
Posts: 16
Joined: Sat Nov 07, 2015 6:40 pm
Location: Los Angeles

Removing Fuel Tank Bracket

Postby picflight » Sat Nov 07, 2015 7:39 pm

I tried heating the aluminum angle bracket [that is holding down the fuel tank] to take it off, but it does not budge at all.

I have tried sliding a putty knife wherever it will fit between the tank and bracket, but no movement.

Are there any tips to getting these brackets off?

They seem to have some 3M4200-type sealant between the bracket and sidewall.

Image
--------
I like man caves that float.

JRP
Posts: 90
Joined: Thu Oct 15, 2015 9:35 pm
Location: Chesapeake

Re: Removing Fuel Tank Bracket

Postby JRP » Sat Nov 07, 2015 9:07 pm

Caveat: I have never removed one of those brackets.

Assuming you have removed any fasteners and all that is left holding the brackets to the sidewall is a sealant of some kind that you suspect is something like 3M4200 or 3M5200, there are various products which can be applied to sealants of this kind to either break them down or break the bond they have with a surface. Some examples, but there are others:

http://www.westmarine.com/buy/anti-bond--anti-bond-2015--P001174804

https://store.marinebeam.com/3m-5200-sealant-and-adhesive-remover/

It's hard to say from just that one photo, but it doesn't look like Boston Whaler used a lot of sealant-adhesive between the bracket and sidewall. So that might be a bit of good news that will speed up the process.

User avatar
picflight
Posts: 16
Joined: Sat Nov 07, 2015 6:40 pm
Location: Los Angeles

Re: Removing Fuel Tank Bracket

Postby picflight » Sat Nov 07, 2015 9:59 pm

I am pretty sure it is 3M4200, I can't imagine that Boston Whaler would use 3M5200 on a serviceable part. It was soft enough to cut with a razor blade where it had oozed out a bit. Only two screws were holding this bracket, so no more fasteners.

The sealant isn't that much; the bracket is very flat against the side wall; I can't get a putty knife in between.

With hardly any gap for the remover to get between the surfaces, I wonder how it will work. Nevertheless, I will give it a try. Thanks for the suggestion.

By the way, this is the first time in 17 years this part is coming out, it's all original.
--------
I like man caves that float.

Sebastian
Posts: 14
Joined: Wed Oct 28, 2015 11:46 pm

Re: Removing Fuel Tank Bracket

Postby Sebastian » Sun Nov 08, 2015 1:02 am

You can try to slide a length of PowerPro Braided Fishing LIne between the bracket and the wall. Saw the braided line back and forth. It has worked for me, the line does wear, but it gets the job done.

JRP
Posts: 90
Joined: Thu Oct 15, 2015 9:35 pm
Location: Chesapeake

Re: Removing Fuel Tank Bracket

Postby JRP » Sun Nov 08, 2015 9:16 am

picflight wrote:...

By the way, this is the first time in 17 years this part is coming out, it's all original.


The top of the tank looks to be in good condition. Why are you removing the tank? Were you having a problem with it, or is this preventative maintenance?

Also, I'm curious what model Boston Whaler you have? The gelcoat looks to be in very nice condition, too.

User avatar
picflight
Posts: 16
Joined: Sat Nov 07, 2015 6:40 pm
Location: Los Angeles

Re: Removing Fuel Tank Bracket

Postby picflight » Sun Nov 08, 2015 10:11 am

JRP--the fuel tank developed a leak; there was fuel in the stern fish locker. The top of the fuel tank is in perfect condition, which apparently does not provide a true condition assessment. :-)

Re your curiosity about the model: 1998 Boston Whaler Outrage 17.

Thank you for the feedback, everything I removed for servicing was put back as original after thorough cleaning.
--------
I like man caves that float.

JRP
Posts: 90
Joined: Thu Oct 15, 2015 9:35 pm
Location: Chesapeake

Re: Removing Fuel Tank Bracket

Postby JRP » Sun Nov 08, 2015 1:43 pm

Copy that. What a hassle. I hope the repair comes together for you -- once you get the brackets removed you should be well on your way.

The Outrage 17 looks very nice. I usually see that model with a 115 HP engine. Yours with the 150 HP engine must scoot along nicely!

User avatar
picflight
Posts: 16
Joined: Sat Nov 07, 2015 6:40 pm
Location: Los Angeles

Re: Removing Fuel Tank Bracket

Postby picflight » Sun Nov 15, 2015 7:54 am

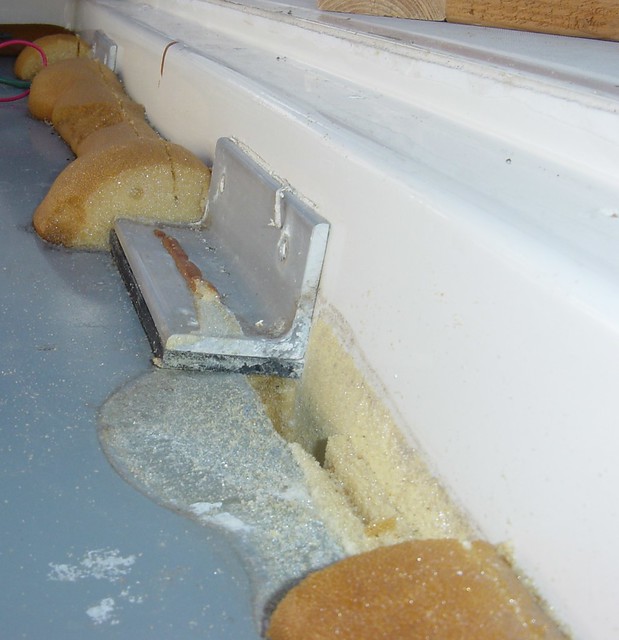
The trick was the heat gun to release the brackets. This time, after reading the 3M specs for 4200 sealant, I heated the brackets aggressively on high for 60-90 seconds. Then a little leverage with a crowbar and the brackets pop out very cleanly. Thanks for all your tips and support.

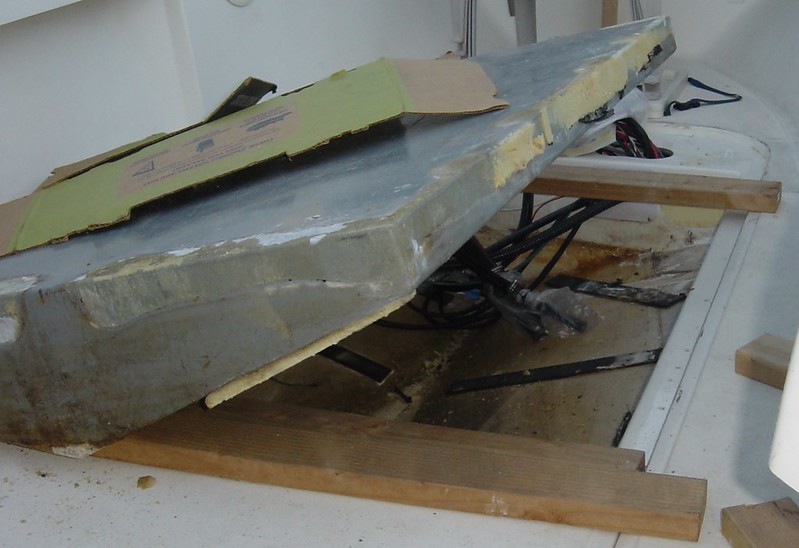
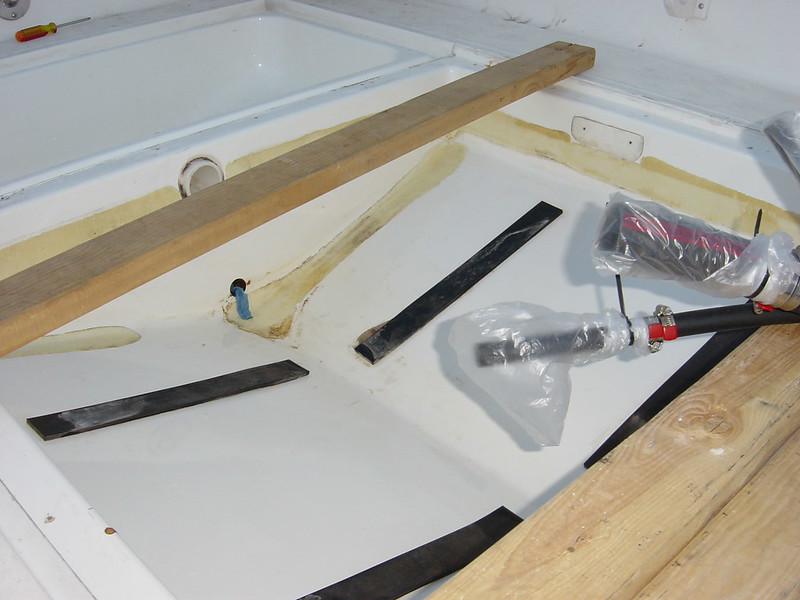
Fuel tank removal was not as difficult as I had imagined it to be. The trick was to clear the corners of foam, get a tow strap under the corners, and lift one side at a time to dislodge. It came out fairly easily since the foam was around the top rim and not on the bottom.

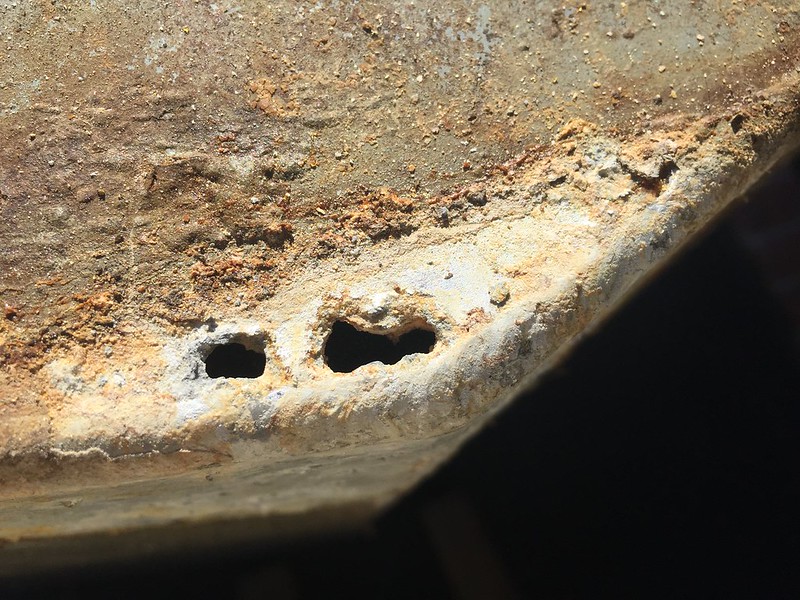
It looks like the drain in the tank cavity is not at the bottom and there is some foam there, which is where the leak in the tank probably is. The foam in the bottom looks to have leaked down during the pour. A more detailed analysis will be done next week after cleanup.

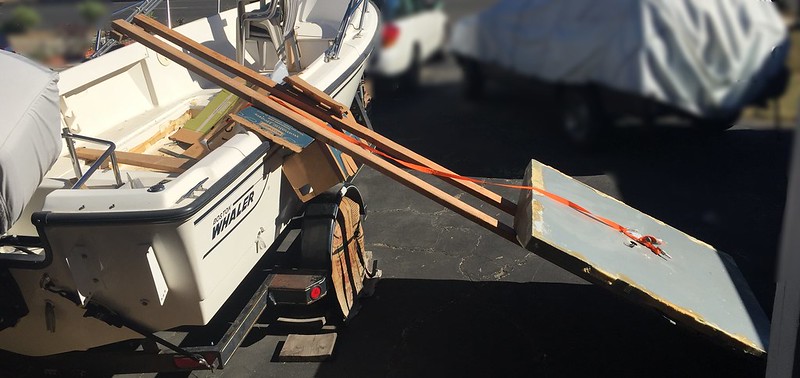
Tank cavity, looking aft
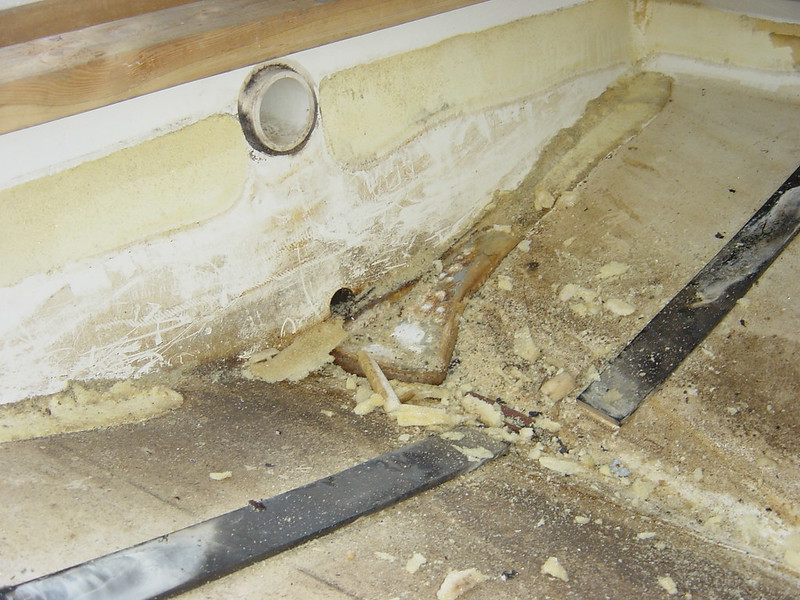
Image

Tank out of cavity
Image
--------
I like man caves that float.

JMARTIN
Posts: 6
Joined: Thu Nov 19, 2015 2:18 pm

Re: Removing Fuel Tank Bracket

Postby JMARTIN » Thu Nov 19, 2015 3:45 pm

If you are going to use foam again, I used the 4 lb with good results from this outfit.

http://www.uscomposites.com/foam.html

John

Jeff
Posts: 138
Joined: Fri Oct 16, 2015 3:27 pm
Location: Detroit Area
Contact:

Re: Removing Fuel Tank Bracket

Postby Jeff » Fri Nov 20, 2015 4:04 pm

I find it very interesting the Whaler got smart and installed what looks like a cavity drain tube at the stern low point of the cavity.
1993 23 Walkaround Whaler Drive - 1988 190 Grady White Tournament- 1981 15' Striper (under restsoration) - Curator of Everything Boston Whaler on Instagram

User avatar
picflight
Posts: 16
Joined: Sat Nov 07, 2015 6:40 pm
Location: Los Angeles

Re: Removing Fuel Tank Bracket

Postby picflight » Mon Nov 23, 2015 3:42 am

Tank is out
Image

A little scraping and the hole is evident on the aft V of the the tank where the foam was on the bottom
Image

Cleaned for new tank
Image
--------
I like man caves that float.

JRP
Posts: 90
Joined: Thu Oct 15, 2015 9:35 pm
Location: Chesapeake

Re: Removing Fuel Tank Bracket

Postby JRP » Mon Nov 23, 2015 7:37 am

Nice work.

I might suggest reducing the depth of the new tank so that it is less likely to contact moisture in the channel at the bottom of the tank cavity. You would lose some tank volume, but modern outboard engines tend to be more fuel efficient than those from the era when this boat was built, so perhaps you don't need maximum fuel capacity anymore?

User avatar
picflight
Posts: 16
Joined: Sat Nov 07, 2015 6:40 pm
Location: Los Angeles

Re: Removing Fuel Tank Bracket

Postby picflight » Mon Nov 23, 2015 1:43 pm

JRP, I thought of changing the shape and or size of the new tank but decided to keep it original. The 1/4" rubber strips on the bottom should provide adequate airflow underneath the fuel tank to keep it dry. I have to be careful when I pour the 4lbs foam to ensure that none of it drips to the bottom.

I am wondering if I should reuse and let the rubber strips as they are glued to the floor of the cavity or glue neoprene strips to the bottom of the tank as suggested here; http://www.yachtsurvey.com/fueltank.htm.

Also, thinking what is mentioned in the link above about galvanic corrosion and rubber; considering to spend $100 for Neoprene.
--------
I like man caves that float.

Jeff
Posts: 138
Joined: Fri Oct 16, 2015 3:27 pm
Location: Detroit Area
Contact:

Re: Removing Fuel Tank Bracket

Postby Jeff » Thu Nov 26, 2015 10:58 am

Yes, I would not foam the tank back in and that link is a good one. Don McIntrye used that same method when he did the fuel tank on his 21.

I would also recommend getting the new tank LineX'd / Rhino-lined prior to install. That will protect it for many many years and prevent any future failures from perforations or cracked welds.
1993 23 Walkaround Whaler Drive - 1988 190 Grady White Tournament- 1981 15' Striper (under restsoration) - Curator of Everything Boston Whaler on Instagram