Completion of 1979 Revenge 22 Fuel Tank Refurbishment
Posted: Tue Jun 12, 2018 1:49 pm
I completed the fuel tank removal, refurbishment, and replacement project [for a 1979 Boston Whaler REVEGE 22] with what I consider to be great success. The problem with these versions of the Revenge is the ridiculously large deck extends past the control console into the cabin. As shown in images linked in my previous posts at
http://continuouswave.com/forum/viewtopic.php?f=6&t=3202&p=18261#p18261
I removed the consoles and cut the deck at approximately the same place that the more modern (c.1982 and forward I believe) decks are cut.
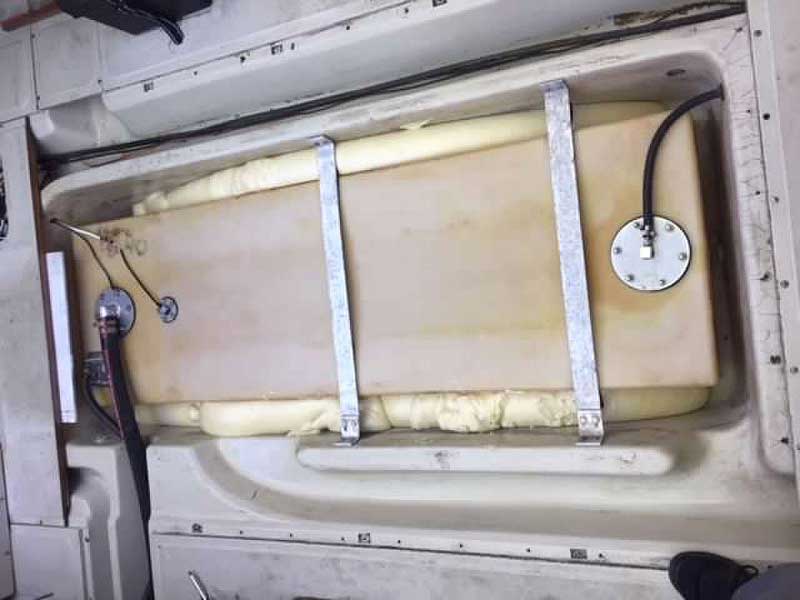
I emptied the tank and replaced the fill, vent, and pickup with new 6-inch aluminum plates by Seabuilt;
http://www.seabuilt.com/plates.php
These are very robust, and are an excellent choice for existing polyethylene tank refurbishing. You can see the plates [in the webpage linked above]. You can also see at the bottom of the tank I added a 1-inch piece of PVC pipe that runs the length of the tank to facilitate water movement from the forward end of the tank cavity to the stern, which will be foamed into place. I also added a fuel sending unit which can be seen just below the fuel fill line.

These are gasketed on both sides, and form a nice tight fit with Nitrile rubber gaskets.
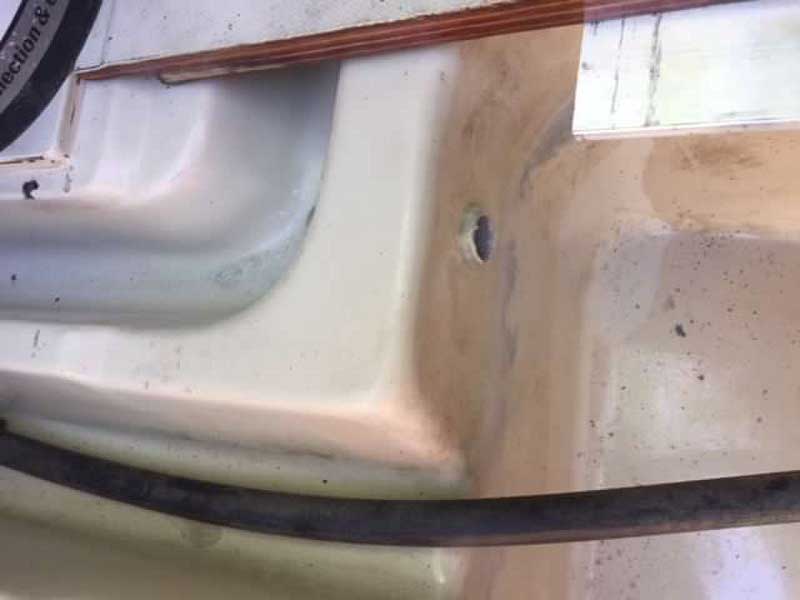
Before I foamed the tank into place, it took the opportunity of having the tank out to correct what I consider a couple of existing design flaws. The first is that the cavity near the Port side, near where the fuel fill lines enter the boat, has no mechanism for water to be relieved. To fix this I added a 1' inside diameter fiberglass tube between the fuel tank cavity and the port cavity so that water can flow into the fuel cavity. See pic below. You can also see the front part of the deck installed here.
Generally I want to keep water out of the fuel cavity. Previously, water in the fuel cavity deformed the Polyethylene tank, denting it and reducing its capacity from 70 gallons to 55 gallons. To prevent water from entering the fuel cavity bottom and remaining there in perpetuity, I added a 1-inch diameter fiberglass drain tube from the fuel cavity to the fish well. This tube will be plugged when using the boat, but I plan on removing the plug when not in use to facilitate water movement from the fuel tank cavity to the fish locker for complete draining. You can see the fiberglass tube epoxied in place here.
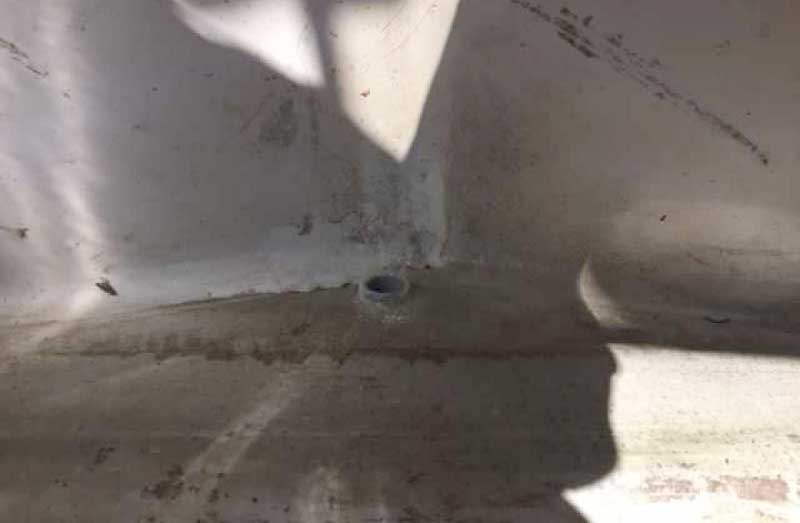
and here
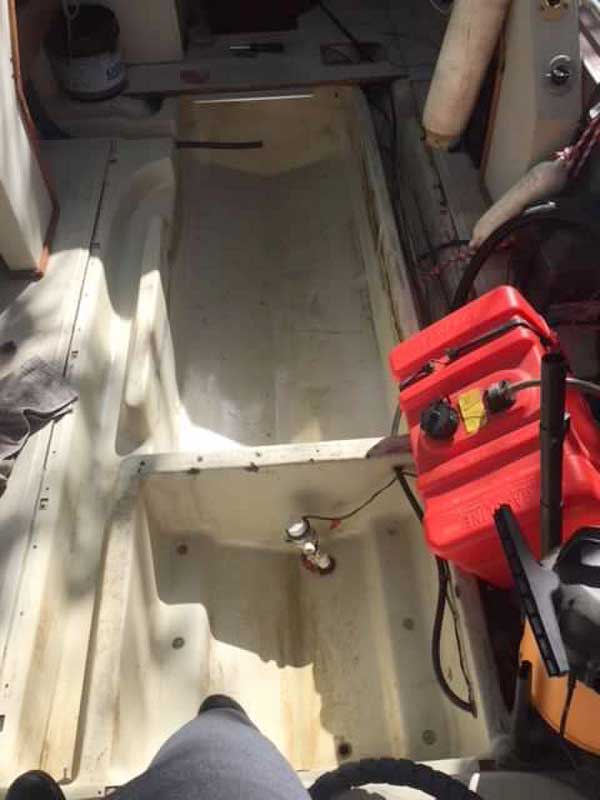
I used X30 expanding foam from Tap Plastics to foam the tank in place. I left the bow and stern section of the tank open, so that water has a place to collect, and move from bow to stern of the tank. Before closing the tank into place, foam was wedged in the bow and stern sections to assist in resisting movement of the tank in the cavity.
After filling with gasoline for the first time, with the deck off to insure nothing was leaking, the boat is now ready to be put back into use.
http://continuouswave.com/forum/viewtopic.php?f=6&t=3202&p=18261#p18261
I removed the consoles and cut the deck at approximately the same place that the more modern (c.1982 and forward I believe) decks are cut.
I emptied the tank and replaced the fill, vent, and pickup with new 6-inch aluminum plates by Seabuilt;
http://www.seabuilt.com/plates.php
These are very robust, and are an excellent choice for existing polyethylene tank refurbishing. You can see the plates [in the webpage linked above]. You can also see at the bottom of the tank I added a 1-inch piece of PVC pipe that runs the length of the tank to facilitate water movement from the forward end of the tank cavity to the stern, which will be foamed into place. I also added a fuel sending unit which can be seen just below the fuel fill line.
These are gasketed on both sides, and form a nice tight fit with Nitrile rubber gaskets.
Before I foamed the tank into place, it took the opportunity of having the tank out to correct what I consider a couple of existing design flaws. The first is that the cavity near the Port side, near where the fuel fill lines enter the boat, has no mechanism for water to be relieved. To fix this I added a 1' inside diameter fiberglass tube between the fuel tank cavity and the port cavity so that water can flow into the fuel cavity. See pic below. You can also see the front part of the deck installed here.
Generally I want to keep water out of the fuel cavity. Previously, water in the fuel cavity deformed the Polyethylene tank, denting it and reducing its capacity from 70 gallons to 55 gallons. To prevent water from entering the fuel cavity bottom and remaining there in perpetuity, I added a 1-inch diameter fiberglass drain tube from the fuel cavity to the fish well. This tube will be plugged when using the boat, but I plan on removing the plug when not in use to facilitate water movement from the fuel tank cavity to the fish locker for complete draining. You can see the fiberglass tube epoxied in place here.
and here
I used X30 expanding foam from Tap Plastics to foam the tank in place. I left the bow and stern section of the tank open, so that water has a place to collect, and move from bow to stern of the tank. Before closing the tank into place, foam was wedged in the bow and stern sections to assist in resisting movement of the tank in the cavity.
After filling with gasoline for the first time, with the deck off to insure nothing was leaking, the boat is now ready to be put back into use.