Page 1 of 1

Filling Console Cut-outs

Posted: Fri Nov 02, 2018 2:30 am
by Spc337
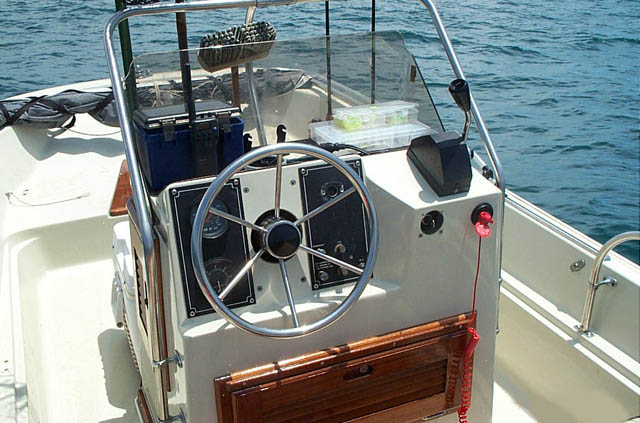
As I get ready to re-wire my boat's console, I'm trying to figure out how to handle the previous cut-outs. There were two, as see below:
IMG_3410.jpg
Fig. 1. Console cut-outs
IMG_3410.jpg (42.53 KiB) Viewed 5671 times


I only need one cut-out. The prior owner had placed some starboard across the front that was functional but not particularly attractive.

I'm complete new to this type of repair work. I think I can cut some plywood to match the hole I want to fill and epoxy it in place, potentially brace it from behind for added support. On the front, I can use some glass tape and epoxy that on to build up. Then attempt a color match of Gelcoat paste.

As I said, I'm new to this: am I just kidding myself?

Should I try to transport my console to a pro?

What costs would I be looking at?

Thanks

Re: Filing console cut outs

Posted: Fri Nov 02, 2018 7:10 am
by Ridge Runner
I can't tell the size of your cut-outs but another choice could be to have Boat Outfitters custom build a small glove box. Minimum dimensions are 6-inch-H x 8-inch-W.

If your cut-outs are too small it looks like you might be able to enlarge your port side opening to meet the minimum. I have used Boat Outfitters glove boxes in many of my boats. Boat Outfitters glove boxes are very high quality and add some more dry storage.

I believe the color "Seafoam" might be the match for your console: https://www.boatoutfitters.com/custom-boat-glove-box

Re: Filling Console Cut-outs

Posted: Fri Nov 02, 2018 11:10 am
by jimh
I suggest a much simpler solution: cover the unused cut-out with a blank panel that matches the other instrument panels. Typically the panels are aluminum, about 0.125-inch thick, are black, and often have a circumferential white stripe. You can fabricate a panel yourself with much less fuss than your proposed restoration of the console's laminate structure at that opening. Also, in the future you may decide you need more space for electrical components, so having a blank panel may be useful.

I suspect that the original configuration from Boston Whaler had two black aluminum panels covering those cut-out openings in the console. Based on Fig. 1 (above) those original panels may have been removed and a single larger and long panel installed to cover those openings. I say this because of the presence of a line of discoloration or dirt that can be seen where a large single panel may have been installed.

To give you an idea of what the OEM installation may have looked like, see below:

Image
OEM black instrument or electrical panel on c.1990 Boston Whaler boat.

Boston Whaler used panels similar to the one shown above to create mounting points for electrical controls. Here is another view of a console showing two electrical panels:

Image
OEM black instrument or electrical panels on classic-era console.

Re: Filling Console Cut-outs

Posted: Fri Nov 02, 2018 3:53 pm
by Phil T
The classic Outrage models with the standard and super consoles included two rectangular switch plates on the flat face. The two shown in your photo are original to the boat.

Here is a comparison photo:
console.jpg
console.jpg (54.81 KiB) Viewed 5626 times


While you can't find these plates off the shelf, they are very easy to make DIY.

Re: Filling Console Cut-outs

Posted: Fri Nov 02, 2018 8:25 pm
by Acseatsri
Or make them out of teak for a more finished look to match the doors.

Re: Filling Console Cut-outs

Posted: Thu Nov 15, 2018 3:47 pm
by Dutchman
To Spc337 (OP) let us know what you end up with. I think the teak is a good idea if you aren't going to use the openings.

Re: Filling Console Cut-outs

Posted: Thu Nov 15, 2018 6:18 pm
by Acseatsri
The other way I've approached this is to use 1/4-inch-thick black Plexiglass rectangular panels to cover holes and also create new spaces to drill into. I cut the plastic on a table saw, then round the edges of the rectangular panels with a 3/16-inch corner-rounding router bit, then flame treat it with a propane torch to smooth the edges. I make the panels a little bit larger than the holes I'm trying to cover or re-drill. Dresses up the original aluminum dash panels quite nicely, but not for Whaler purists.

I opted to not have screw holes in the plastic, so I use five-minute-epoxy to hold the panels in place. I've had this setup for four seasons, and none of the panels have come loose.