The process of removing the fuel tank from the hull was not too bad. I used flat-blade screwdriver pushed through the foam all around the tank. This took time but was not hard.
The OEM fuel tank depth is onLY 6-inches on the outside edges. The fuel tank has a v-bottom shape that matches the fuel tank cavity molded into the hull.
The fuel hoses that connect to the tank are a filleR hose, vent hose, and fuel withdrawal hose to the engine. The other two hoses that go to the stern of the boat [as seen in Figure 1] are for a sump pump and an on-deck live well.
To lift the tank I used a small 1/4-Ton chain lift and a 2 x 6 plank, along with some tie down straps. To free the tank from the hull, I removed the fuel sender plate and used a hook to lift the tank. I put some upward pressure on the tank and inserted a crowbar at the sides of the tank. I wiggled the fuel tank a bit, and it pulled loose.
There was a hole in the fuel tank at the lowest point of the tank closest to the stern of the boat. I think the reason the fuel tank corroded was because the plug for the fuel cavity was left in during storage. There was sitting water under the tank after removal. At the primary spot of corrosion only a tap was needed to open a thumb-size hole.
I am currently cleaning the fuel tank cavity area and getting ready for my reinstall.
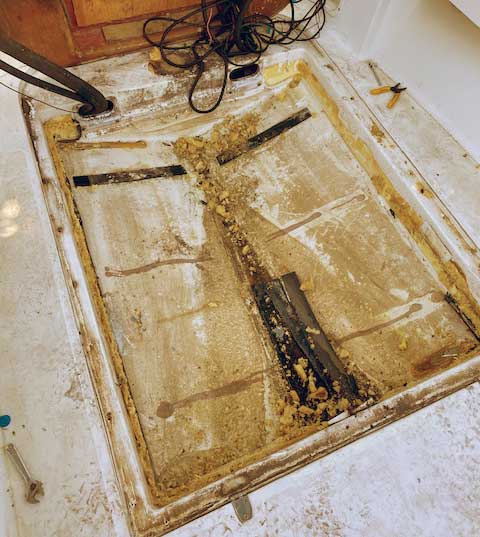
- Fig. 2. OUTRAGE 17 fuel tank cavity.
- fuelTankCavity.jpg (43.38 KiB) Viewed 6527 times
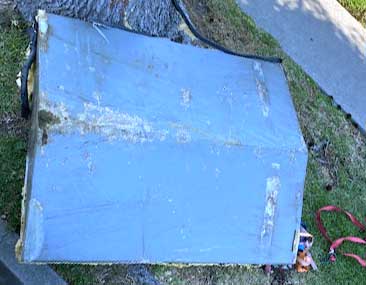
- Fig. 3. Discarded OEM fuel tank.
- discardedFuelTank.jpg (15.44 KiB) Viewed 6527 times
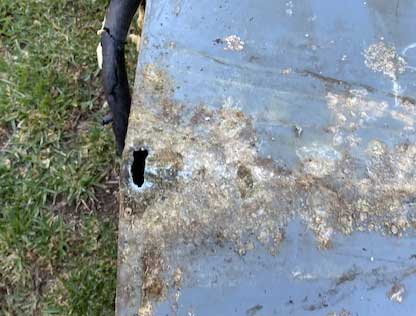
- Fig. 4. A significant hole in the bottom aft end of the OEM fuel tank.
- fuelTankHole.jpg (22.5 KiB) Viewed 6527 times
Once the new fuel tank is installed I will post more information.
I have learned so much and am glad I did the project myself. I know my boat inside and out now.
I plan to install hydraulic steering and replace all wiring at this time since the deck and console are up. The 1998 OUTRAGE 17 boat will then be in perfect shape for the rest of summer. [Good topics for separate threads--jimh]