Repair of Keel Damage

Repair or modification of Boston Whaler boats, their engines, trailers, and gear
Veloven9154
Posts: 7
Joined: Mon Jan 27, 2025 7:57 am

Repair of Keel Damage

Postby Veloven9154 » Sat Apr 26, 2025 2:21 am

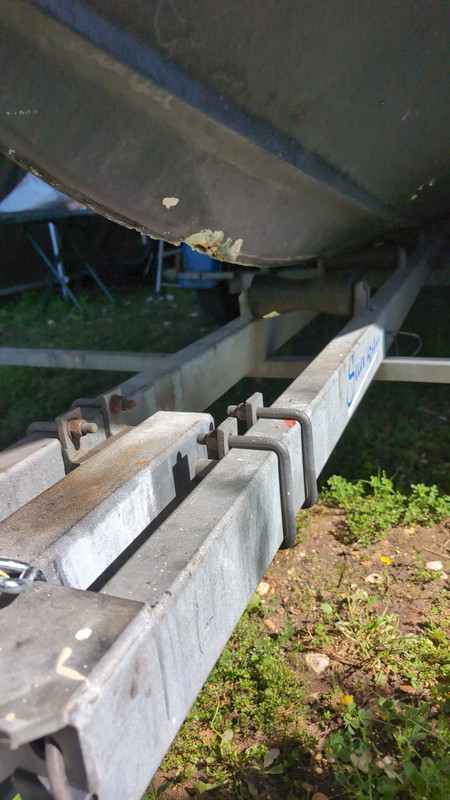
Q1: how is damage to a Unibond hull repaired, such as seen in Figure 1 below?

This damage occurred on April 25, 2025, when the boat was being unloaded from the trailer.

hullDamageAtKeel.jpeg
Fig. 1. Hull damage at keel.
hullDamageAtKeel.jpeg (10.37 KiB) Viewed 3183 times


[Moderator's note: an uncropped larger image shows undamaged areas of the hull and the trailer; the image focus appears to be only on the foreground objects. The actual area of damage is not in sharp focus.]

Q2: what type of repair is needed for the keel damage as seen in Figure 1?

Q3: should this damage be repaired before any further use of the boat?

Q4: does this damage require immediate repair?

ASIDE: the boat is a 1976 OUTRAGE [of unspecified length].

Thanks for your help and advice.

jimh
Posts: 13290
Joined: Fri Oct 09, 2015 12:25 pm
Location: Michigan, Lower Peninsula
Contact:

Re: Repair of Keel Damage

Postby jimh » Sat Apr 26, 2025 6:37 am

Veloven9154 wrote:Q1: how is damage to a Unibond hull repaired, such as seen in Figure 1 below?
For advice on making repairs to the Unibond hull of your Boston Whaler boat, please read the article that is pinned at the top of the REPAIRS and MODIFICATIONS forum (i.e., this forum) at

Advice on Repair of Unibond Hulls
https://continuouswave.com/forum/viewto ... f=6&t=9254

All three cited articles in the above thread have very good information.

jimh
Posts: 13290
Joined: Fri Oct 09, 2015 12:25 pm
Location: Michigan, Lower Peninsula
Contact:

Re: Repair of Keel Damage

Postby jimh » Sat Apr 26, 2025 6:49 am

Veloven9154 wrote:Q2: [using the four types of damage as defined in the Boston Whaler factory repair instructions] what type of repair is needed for the keel damage as seen in Figure 1?
Judging the damage to the hull from the photograph in Figure 1 is difficult due to the small image size, poor lighting, soft focus, and low resolution.

Generally any damage which involves the gel coat layer of the hull being torn away or punctured should be repaired, but the size of the damage and the loss of structural integrity must be considered. The damage seen in Figure 1 may best be repaired using the method described by Boston Whaler for small area structural damage. For this particular repair I would use epoxy resin thickened with high-density filler in preference to laminating polyester resins.

Depending on the depth of the penetration of the damage, use of some fiberglass cloth or mat may be needed. Again, due to the small image an assessment of the exact method is hard to make.

Because this area of the hull will always be below the water line, epoxy resin will give you a better repair due to its better water resistance, higher strength in making secondary bonds to fully cured polyester resins, and better curing properties. Epoxy resin can be tinted to give a color match to the hull gel coat. Unless you are very concerned about creating an invisible color-matched repair, I would not bother to apply a top coat of gel coat resin, as no one will see this part of the hull except when the boat is on the trailer. Further, the hull looks like it has been bottom painted, so there is really no need to get a color-match on the repair.
jimh
Posts: 13290
Joined: Fri Oct 09, 2015 12:25 pm
Location: Michigan, Lower Peninsula
Contact:

Re: Repair of Keel Damage

Postby jimh » Sat Apr 26, 2025 6:54 am

Veloven9154 wrote:Q3: should this damage be repaired before any further use of the boat?

Q4: does this damage require immediate repair?
Damage of this type--keel rash--must be repaired.

If you must continue to use the boat before making any repair, you should apply a high-quality high-adhesive-strength waterproof duct tape patch over the area of damage to ensure that water is not going to be able to cause further damage and will not be able to soak into the foam interior of the boat.

As long as the boat remains on the traier, the repair can be delayed if necessary, but the delay risks having further water getting into the foam. Any wetness in the foam must be allowed to completely dry before you can make a proper repair.

Veloven9154
Posts: 7
Joined: Mon Jan 27, 2025 7:57 am

Re: Repair of Keel Damage

Postby Veloven9154 » Sat Apr 26, 2025 8:57 am

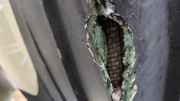
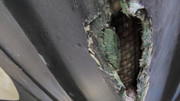
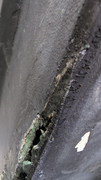
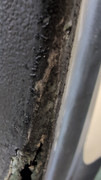
Hi Jim. Thank you for your information. Here are [tiny images that are hyperlinks to] better photos:

ImageFig. 2.

ImageFig.3.

ImageFig. 4.

ImageFig. 5.

ImageFig.6.

Veloven9154
Posts: 7
Joined: Mon Jan 27, 2025 7:57 am

Re: Repair of Keel Damage

Postby Veloven9154 » Sat Apr 26, 2025 9:04 am

The 1976 Outrage 19 stayed in water for about a half-hour before we got it back on the trailer.

I've set the trailer with the front set as low as possible and rear of boat raised by about six inches so water could evacuate. Water is dripping out very slowly.

Q4: how long before it can be considered as dry?

Thank you

jimh
Posts: 13290
Joined: Fri Oct 09, 2015 12:25 pm
Location: Michigan, Lower Peninsula
Contact:

Re: Repair of Keel Damage

Postby jimh » Sat Apr 26, 2025 11:20 am

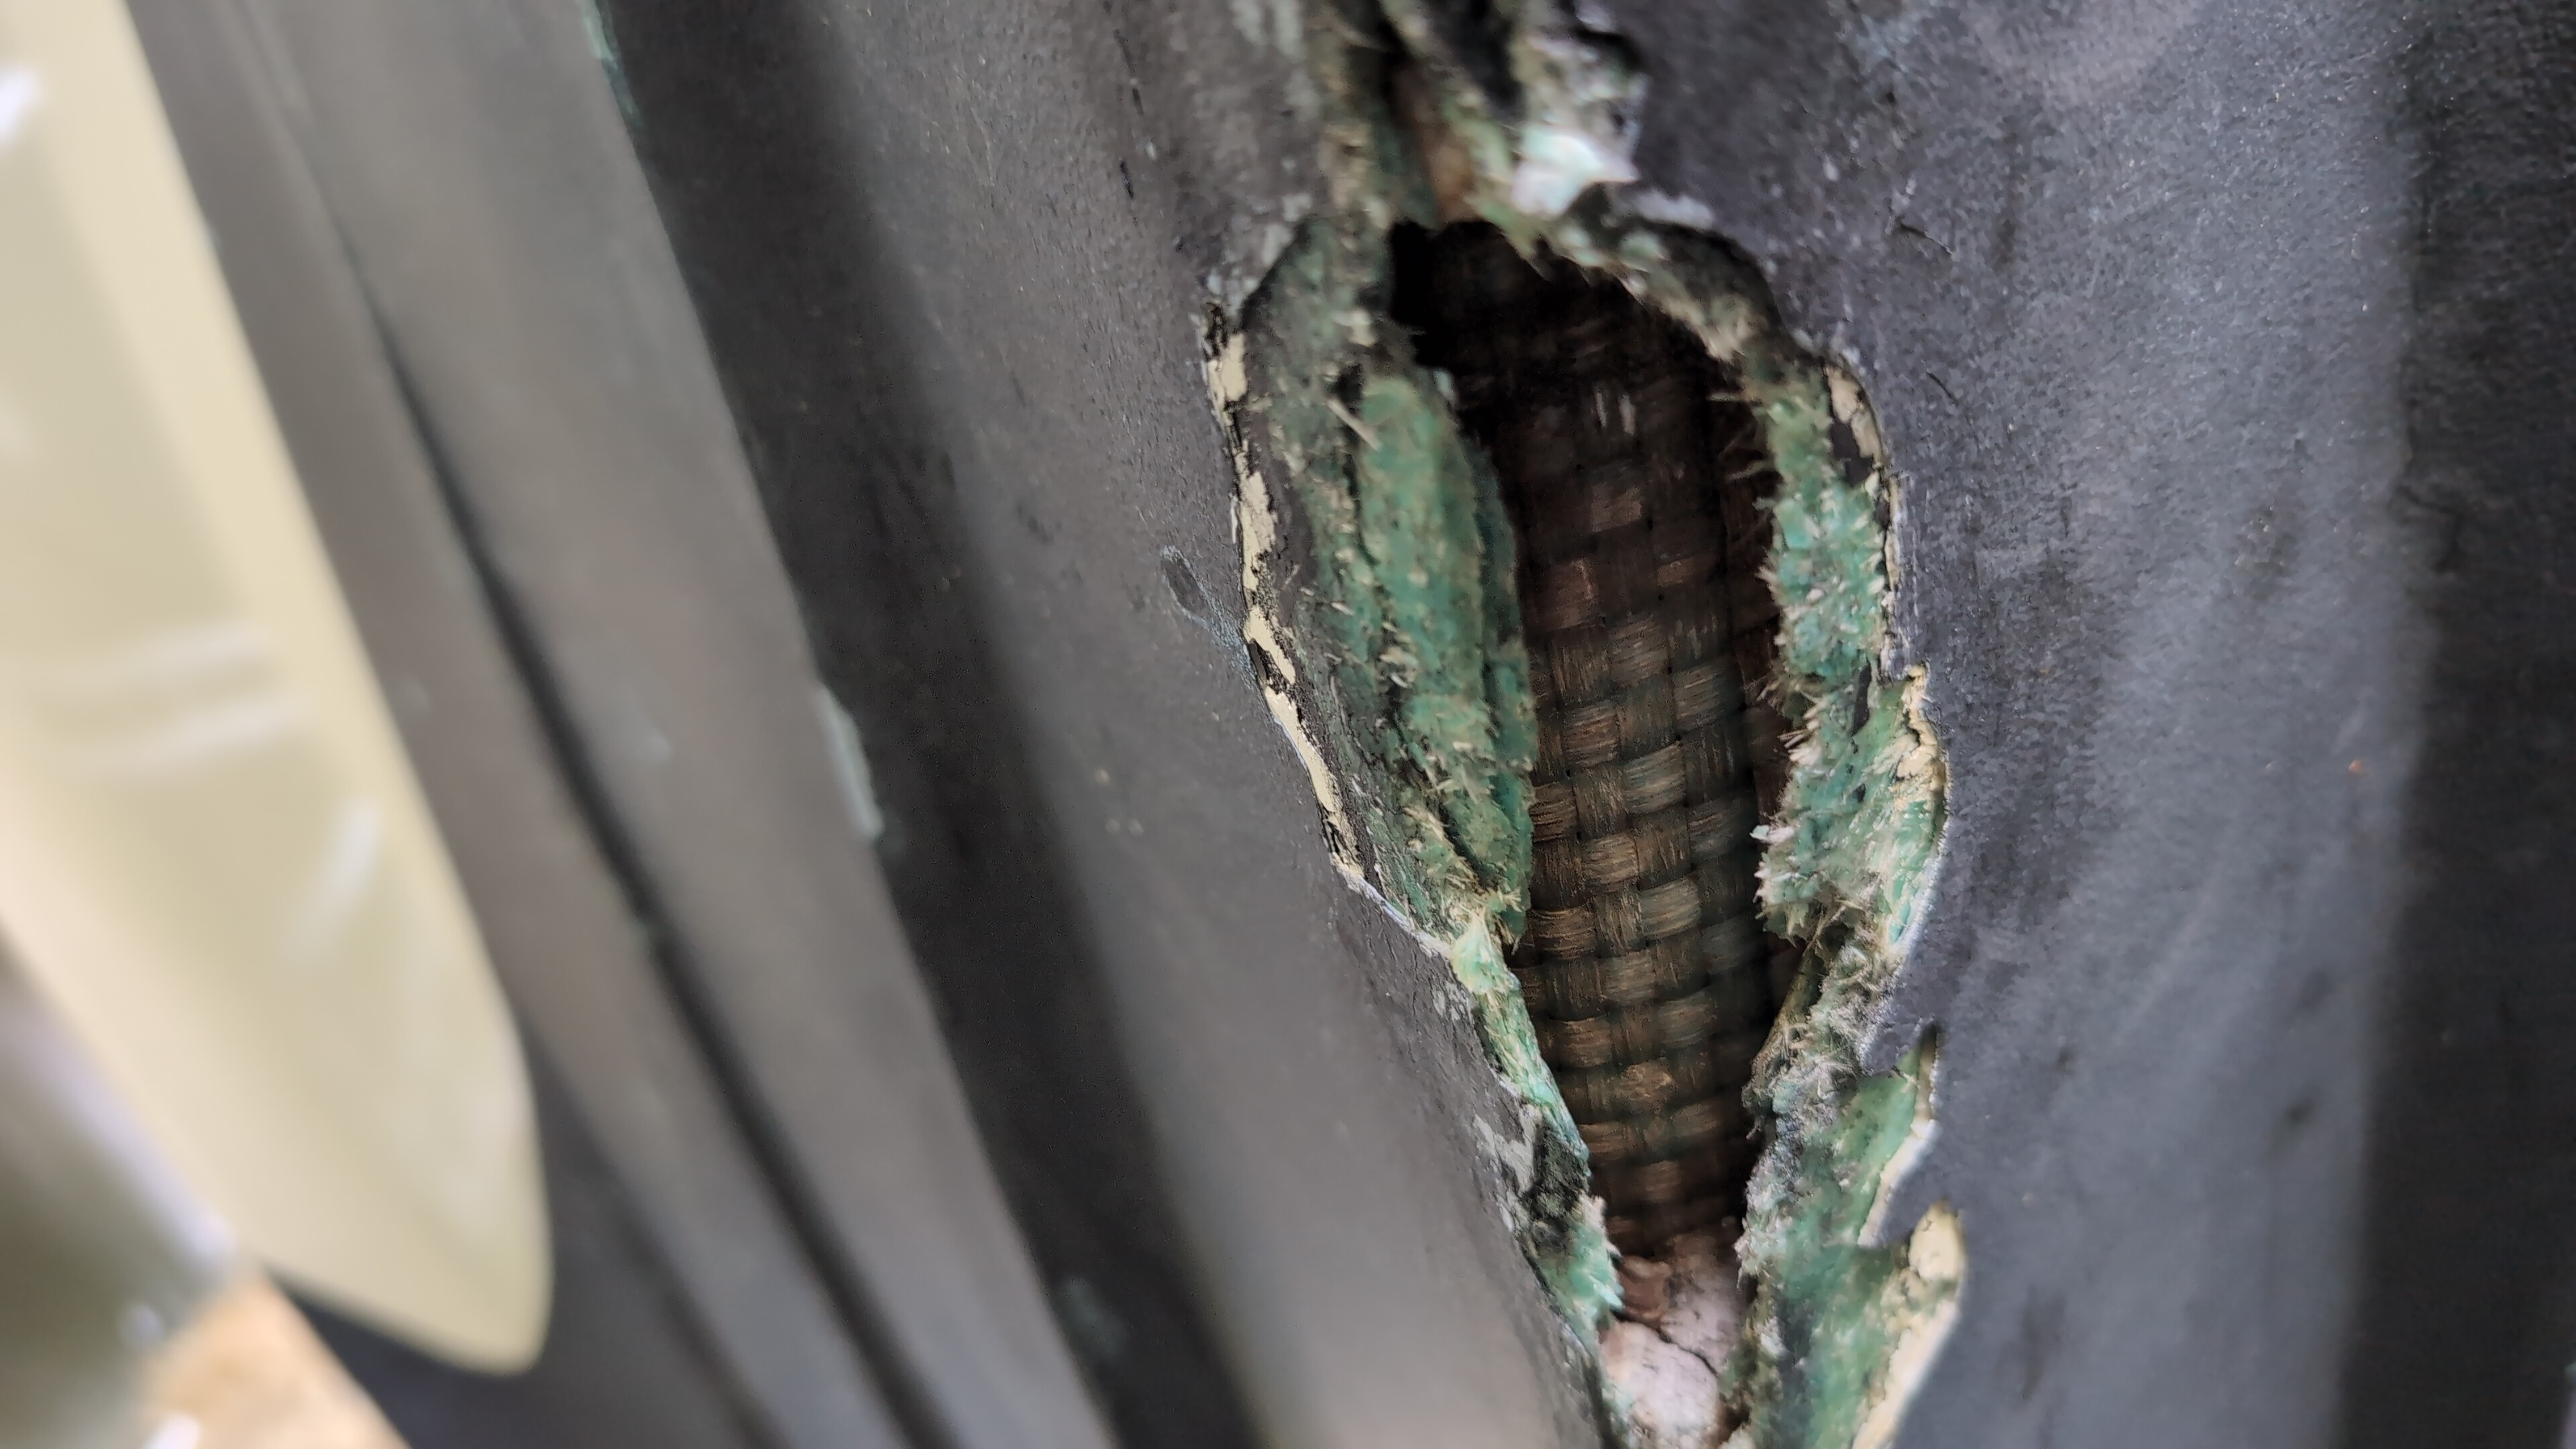
The best view of the damage is seen in Figures 3 and 4. Here is a good close-up view:

https://i.postimg.cc/gmgM0xgC/IMG-20250426-WA0004.jpg

The damage goes past the gel coat layer, past the blue-green lamination layer, past the foam, and all the way to what looks like the woven mat layer of (the other molded part called) the hull liner section. There seems like there is a void in the interior of the hull at that location. That woven mat looks stranger dry.

There should not be any part of the hull that is NOT filled with foam.

Q5: have you already dug-out loose foam from that spot?

Maybe this (apparent) void it is a defect in the original layup, and now a weak spot in the hull, which would explain how badly it failed when it (apparently) made hard contact with some steel on the trailer. There sure are many sharp corners on the trailer rigging.

Also, when the hull is on the trailer the keel should be in contact with and bearing weight onto the keel rollers. In one of your photographs there is an inch or two of air gap between the keel and a roller. Maybe that is not the normal position, and is something you have done to promote water to drain.

Veloven9154
Posts: 7
Joined: Mon Jan 27, 2025 7:57 am

Re: Repair of Keel Damage

Postby Veloven9154 » Sat Apr 26, 2025 12:35 pm

Initial damage was not [as] bad [as it appears in Figures 2 and 3]. I made the damage look worse by pulling out broken pieces [of the hull] that were still in place. I did that after I got home [from the launching ramp with the boat on the trailer].

As this is an old boat I reckon the hull has already been repaired; what came out of the hole were little chunks of white stuff looking like the kind [of packing material] found in boxes to protect fragile items. There was no green foam as expected.

My boat had several owners before me, and to exactly know [what has happened to the boat before I got it] is difficult.

I'll have to wait for the little drops of water, one every 2 [unclear, perhaps means feet or minutes—please do not use marks of punctuation as a way to indicate units of length or units of elapsed time; this just leads to confusion] or so, to finish dripping, and then I hope [the damaged area of the hull and keel] will dry out.

jimh
Posts: 13290
Joined: Fri Oct 09, 2015 12:25 pm
Location: Michigan, Lower Peninsula
Contact:

Re: Repair of Keel Damage

Postby jimh » Sat Apr 26, 2025 4:13 pm

Veloven9154 wrote:There was no green foam as expected.
The foam injected into the hull by Boston Whaler is NOT green. The foam is usually initially white and yellows with age. The laminating polyester resin or perhaps the fiberglass strands have a green hue.